

Switching Real Estate Software
Preparation
Section titled “Preparation”When you switch your real estate software, you do not need to make any special settings in WP-ImmoMakler. However, it is important that you delete all properties from the website before switching.
Ideally, remove the properties from your website using the old real estate software. You can then transfer the listings from the new software. If the old software is no longer available, delete the properties manually in the WordPress backend.
Why Must Properties Be Deleted Before Switching?
Section titled “Why Must Properties Be Deleted Before Switching?”Every real estate software transfers properties with its own internal identifier (ID). After switching, WP-ImmoMakler can no longer match the existing listings on the website to the new software — they can therefore neither be updated nor deleted automatically.
Manually Deleting Properties in the Backend
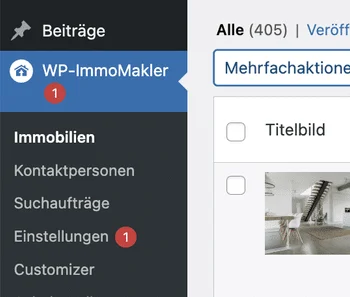
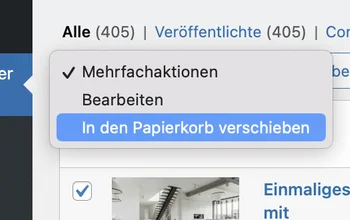
Section titled “Manually Deleting Properties in the Backend”Navigate in the WordPress backend to WP-ImmoMakler > Properties. Activate the checkbox next to “Featured image” to select all listings at once and move them to the trash. You can also select individual listings. Then empty the trash.
“I Forgot to Delete the Properties Before Switching!”
Section titled ““I Forgot to Delete the Properties Before Switching!””That is not a problem. Simply delete all listings (old and new) and then run a full sync from the new real estate software.
Checking Compatibility with the New Software
Section titled “Checking Compatibility with the New Software”Check in the list of supported real estate software solutions whether your new software is compatible. If your real estate software is not yet on the list, contact support to clarify whether a connection is possible.