

Customising the detail view
The appearance of the individual property detail page (exposé) is managed centrally in the WordPress Customizer. There you can see your changes immediately in the live preview before saving them.
Accessing the Customizer
Section titled “Accessing the Customizer”Open the Customizer in your website’s backend (wp-admin) under Appearance → Customize. WP-ImmoMakler adds its own section WP-ImmoMakler with the subsection Property Detail View.
Layout and Width
Section titled “Layout and Width”These options determine the basic structure of the detail page – width, column arrangement, and map display.
| Option | Description |
|---|---|
| Maximum width of the detail view (px) | How wide the detail view should be at most (default: 1,300 px). |
| Number of columns | Single or two-column layout of the detail page (default: 2 columns). |
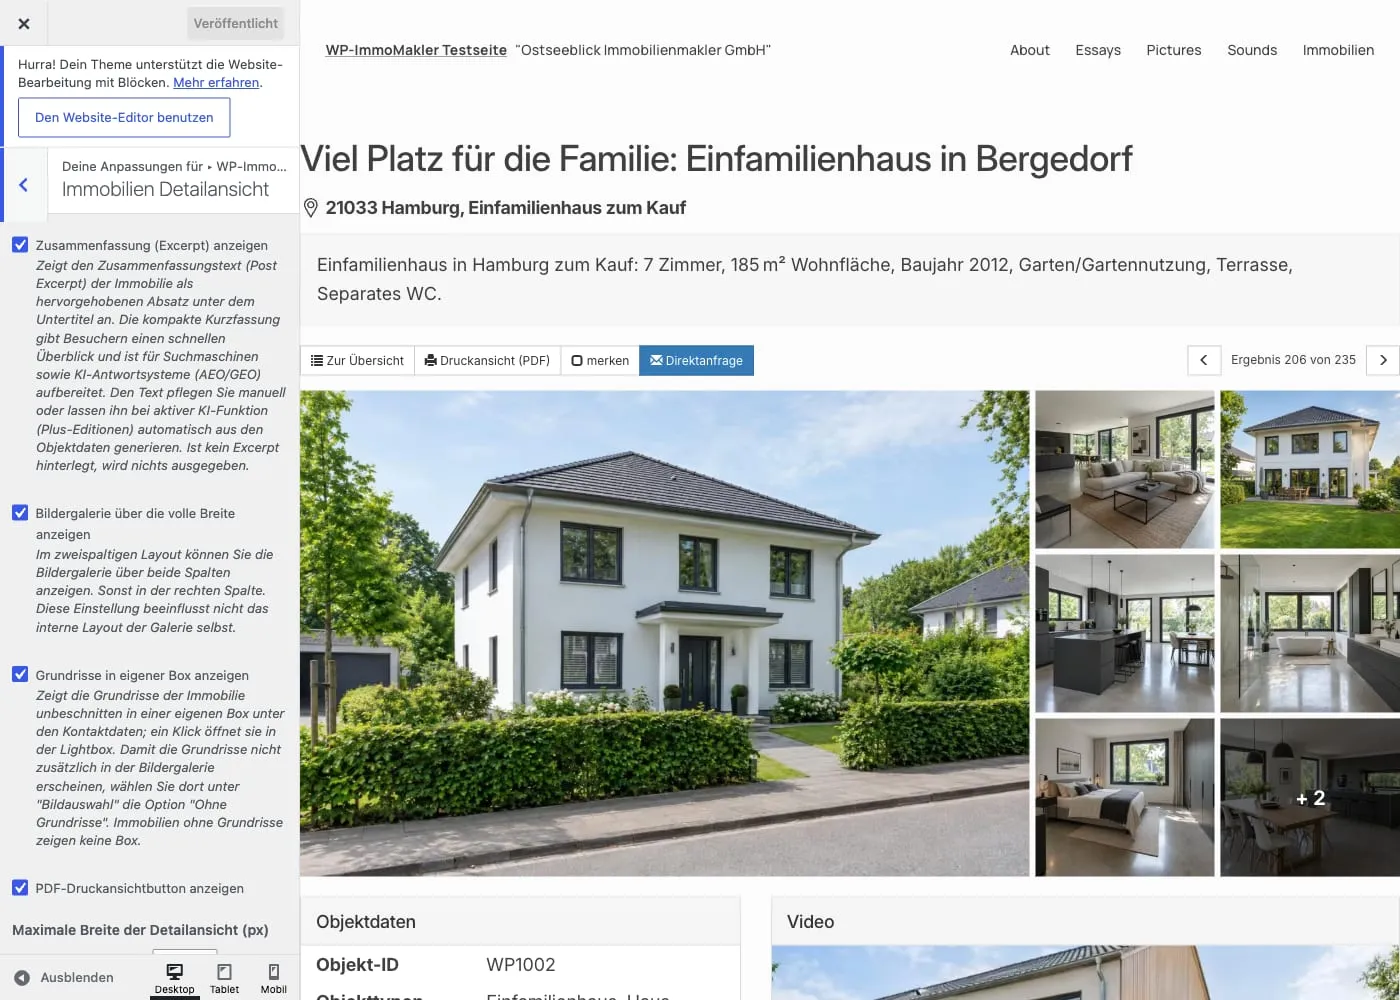
| Display image gallery at full width | Two-column layout only: displays the image gallery across both columns instead of just the right column. This setting does not affect the internal layout of the gallery itself. |
| Map height in px (detail view) | Height of the location map in the detail view. Set to 0 to define the height individually via CSS instead. |
Show and Hide Content
Section titled “Show and Hide Content”Specify which content areas appear on the detail page.
| Option | Description |
|---|---|
| Show summary (excerpt) | Displays the summary text (post excerpt) of the property as a highlighted paragraph below the subtitle. The brief summary gives visitors a quick overview and is optimised for search engines and AI answer systems (AEO/GEO). If no excerpt is stored, nothing is output. |
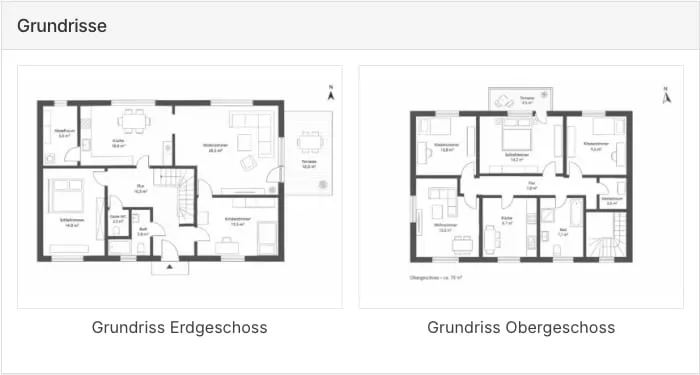
| Show floor plans in a box of their own | Displays the property’s floor plans in a dedicated “Floor plans” box directly below the contact box. Unlike in the gallery, floor plans there are displayed uncropped and at full size, with their title as a caption; clicking opens the floor plan in the lightbox, where you can browse through all floor plans. Properties without floor plans show no box. Disabled by default – see Floor plans in a box of their own. |
| Show contact details in exposé | Shows the contact person block with contact details in the detail view. |
| Automatically display custom OpenImmo fields | Automatically displays custom fields from the OpenImmo import (user_defined_simplefield, user_defined_anyfield). |
| Suppress street names and house numbers of properties | Hides the street and house number in the details and on Google Maps. If “Release address” is already disabled in the estate agent software, this data is not imported at all. |
| Show contact details | Choose which individual contact fields (e.g. name, phone, email) appear for the contact person. Detailed guide: Customising contact details. |
| Show similar properties in the detail view PLUS | Automatically displays a block of similar properties below the detail view. Details: Similar Properties. |
| Number of similar properties PLUS | How many similar properties are displayed (1 to 4); also determines the number of columns in the row. |
Floor Plans in a Box of Their Own
Section titled “Floor Plans in a Box of Their Own”On import (e.g. via OpenImmo), WP-ImmoMakler automatically detects floor plans and distinguishes them from photos. By default, the image gallery shows both together. With the Show floor plans in a box of their own option, floor plans instead get their own box directly below the contact box:
- The floor plans appear in a grid of up to two columns, which reduces to a single column on narrow screens.
- Each floor plan is fully visible – nothing is cropped, not even for portrait-orientation images.
- The floor plan’s title from the estate agent software (e.g. “Ground floor”) appears below it as a caption.
- Clicking opens the floor plan in the lightbox, where your visitors can browse through all of the property’s floor plans and zoom in. The lightbox follows the Open Lightbox on Click setting of the image gallery.
To prevent floor plans from also appearing in the image gallery, set its image selection there to Exclude floor plans.
Format Description Texts
Section titled “Format Description Texts”WP-ImmoMakler can automatically clean up and uniformly format the description texts imported from the estate agent software.
| Option | Description |
|---|---|
| Remove HTML from description texts | Removes existing HTML and outputs the texts with clean p, br, strong and b tags (uses wpautop()). |
| Convert bullet points to “ul” elements | Automatically converts lists in the description text into real HTML lists. |
| Indent bullet points slightly | Indents bullet points a little instead of aligning them flush with the text. |
| Apply typographic improvements | Displays metre, square metre and percentage values uniformly and separates them with a narrow non-breaking space. |
| Convert URLs in description texts to links | Detects URLs and email addresses and converts them into clickable links. |
| Convert phone numbers in description texts to links | Automatically converts phone numbers into clickable tel: links. |
| Standardise phone number prefix | Standardises the country prefix of phone numbers (e.g. +49 …, 0049 … or 0…); takes the country into account. |
Box Layout
Section titled “Box Layout”The content areas of the detail page are displayed in boxes (panels). Use the following options to customise their appearance.
| Option | Description |
|---|---|
| Show borders | Shows or hides the border around the boxes. |
| Border colour | Colour of the box border (default: #dddddd). |
| Corner radius in pixels | Radius for rounded corners. Choose 0 for sharp corners. |
| Box heading background colour | Background colour of the box headings (default: #f5f5f5). |
| Box background colour | Background colour of the boxes (default: #ffffff). |
| Light shadow around boxes | Gives the boxes a more three-dimensional appearance. |
| Box shadow brightness | Brightness of the box shadow (185–254). |
Colour Status Bars
Section titled “Colour Status Bars”Configure the status bars (“new”, “top property”, “sold”, etc.) in the detail view in the Customizer under WP-ImmoMakler → Colours under Default colour of status bars (detail view). With the option Use extra colours for each status you can set your own colours for “sold/let”, “reserved” and “new”.
WP-ImmoMakler Notice
Section titled “WP-ImmoMakler Notice”With the option Show WP-ImmoMakler notice you can display a subtle note at the end of the detail view indicating that the view was created by WP-ImmoMakler.
Further Customisations
Section titled “Further Customisations”Customisations beyond the Customizer options can be made via CSS or template override in the WP-ImmoMakler Child Skin Plugin. This ensures your changes are retained during plugin updates. CSS rules go in the immomakler.css of the child skin plugin – start with an empty file and only add the styles you actually want to override.