

Avada
WP-ImmoMakler provides its own elements for the Avada Builder of the Avada theme. They are available automatically as soon as the Avada Builder plugin is active — no setting is required.
In the Avada Builder’s element picker you will find the elements on the Design Elements tab. Type “Property” into the search to find them quickly.
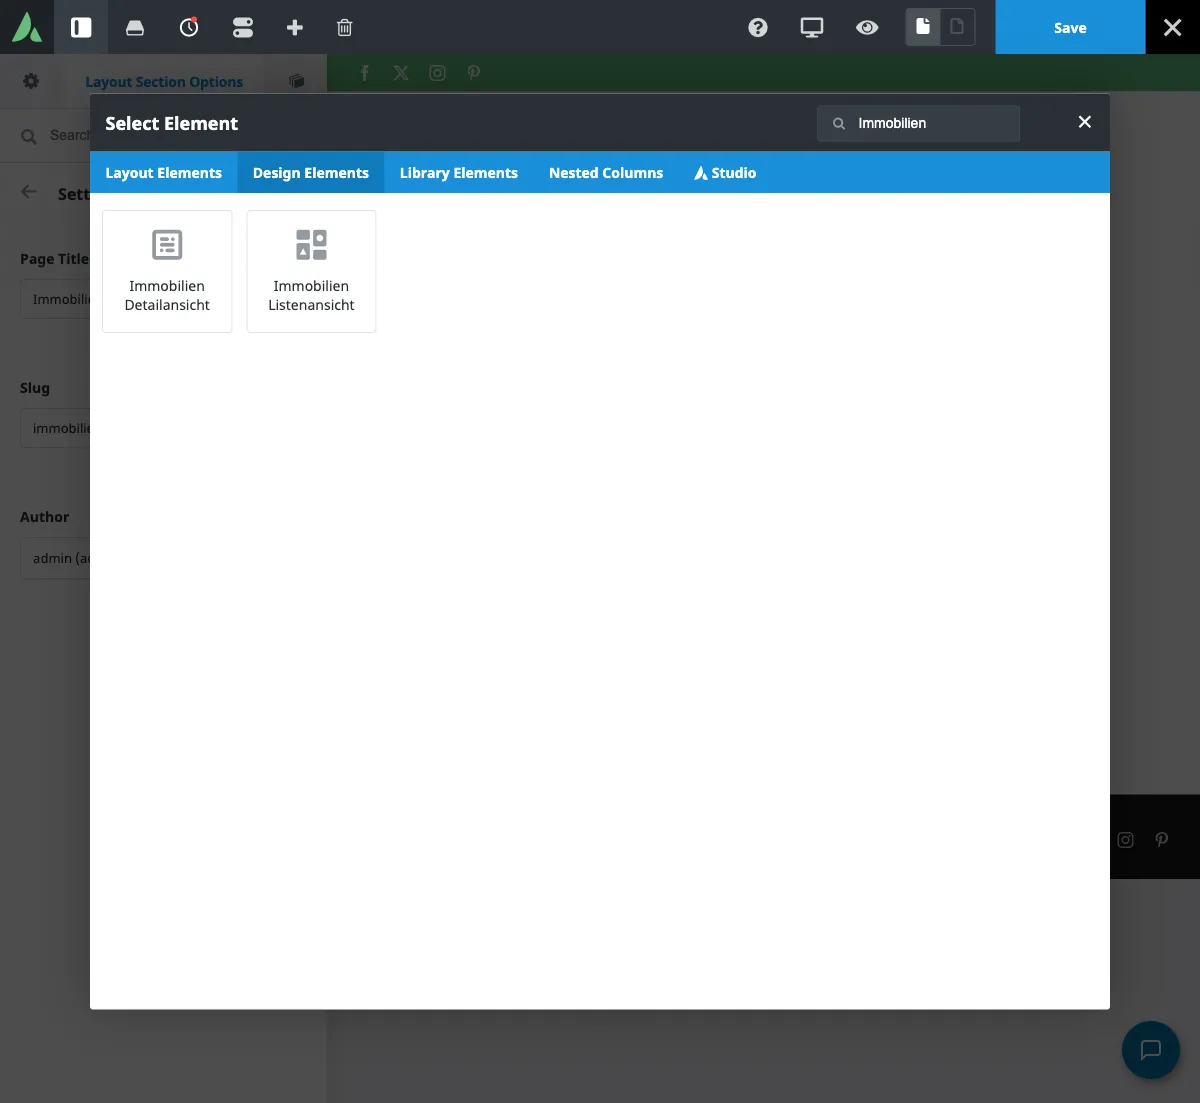
Available elements
Section titled “Available elements”| Element | Description | Used in |
|---|---|---|
| Property Listview | Complete property list with search form from the WP-ImmoMakler HTML template | Avada Layout for the list view |
| Property details | Complete property detail page from the WP-ImmoMakler HTML template | Avada Layout for the detail view |
Options
Section titled “Options”Clicking the element opens its options. Here you decide which parts of the view the element outputs:
| Option | Element | Description |
|---|---|---|
| Show heading | both | Outputs the heading (h1). Set to “No” if you style the page title yourself |
| Show Image Gallery | Detail view | Outputs the image gallery within the detail view |
| Show Summary | Detail view | Outputs the summary (post excerpt) below the subtitle. If no summary is set, nothing is output |
All options are set to “Yes” until you change them.
Below these come the options that every Avada element has: Element Visibility, which hides the element by screen size, as well as CSS Class and CSS ID for the enclosing HTML element.
Setting up Avada Layouts
Section titled “Setting up Avada Layouts”With Avada Layouts you decide which content Avada outputs on which pages of your website. For the properties you create two layouts: one for the list view and one for the detail view. Each gets a condition defining which pages it applies to, and a Layout Section for the content, in which you place the WP-ImmoMakler element.
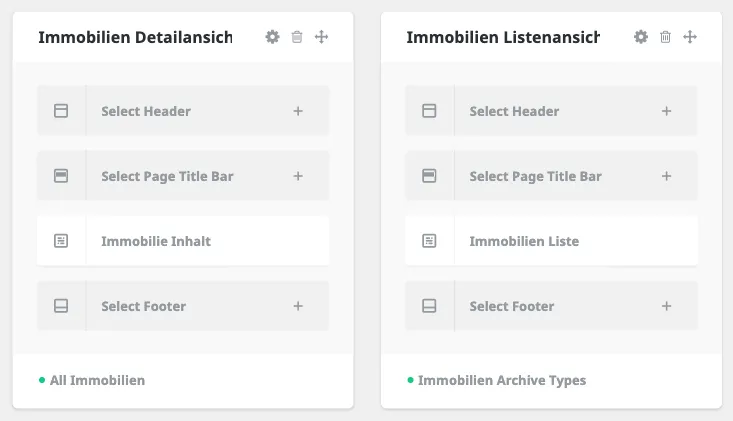
Detail view
Section titled “Detail view”-
Create the layout
In the backend of your website (wp-admin), open Avada → Layouts, enter a name under Layout Builder, for example “Property detail view”, and click Create New Layout.
-
Set the condition
In the new layout, click the gear icon. On the Immobilien tab, choose the condition All Immobilien and close the window. Use Specific Immobilien instead to limit the layout to individual properties.
-
Create a Layout Section for the content
In the layout, click Select Content, enter a name under New Section and click Create New Section. The new Layout Section opens in the Live Builder.
-
Choose a preview property
In the Live Builder, open the Layout Section Options and then the Layout Section area. Set View Dynamic Data As to Immobilie and click Preview. The Live Builder now shows the elements with the data of a property. Under Select Immobilie you can pick a specific one if needed.
-
Insert the element
Insert a container and, inside it, the element Property details. In its options, set whether the heading, image gallery and summary should appear.
-
Save
Click Save.
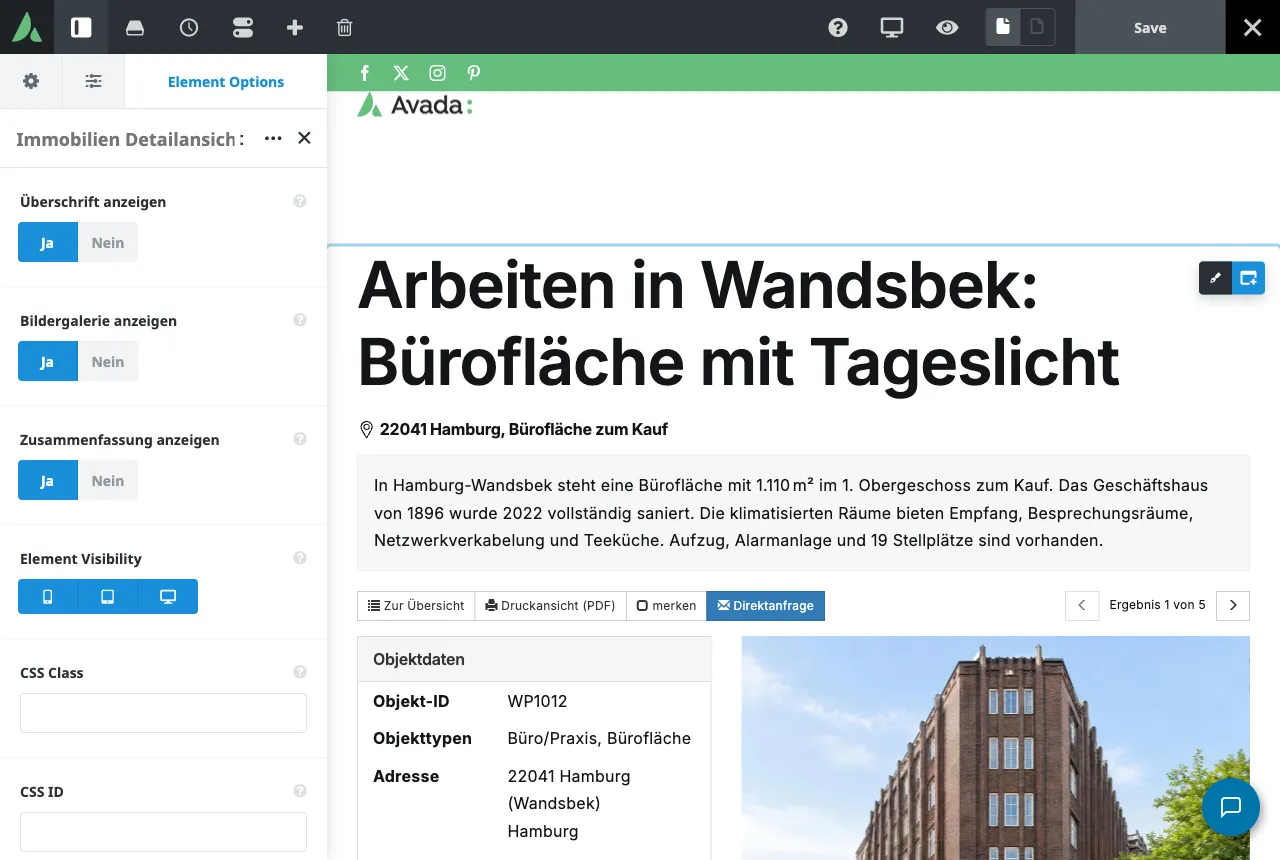
Every property detail page then appears in your Avada Layout, with the data of the property being viewed.
List view
Section titled “List view”-
Create the layout
Under Avada → Layouts, create a second layout, for example “Property list view”.
-
Set the condition
Via the gear icon, choose the condition Immobilien Archive Types on the Archives tab.
-
Create a Layout Section for the content
Create a new Layout Section via Select Content.
-
Choose a preview
In the Layout Section Options, also set View Dynamic Data As to Immobilie. The element Property Listview always shows the property list in the Live Builder regardless. Only with this setting, however, does the Live Builder apply changed options to the preview immediately — with Archives or Default, a change only appears after saving and reloading.
-
Insert the element and save
Insert the element Property Listview and click Save.
Then open the property list view (usually /immobilien/). Search filters, sorting and pagination work as usual.
Alternative: template pages
Section titled “Alternative: template pages”Instead of using an Avada Layout, you can also use the two elements on a template page: an ordinary WordPress page that you design with the Avada Builder and register in WP-ImmoMakler as the template for the list or detail view.
Customizing the appearance
Section titled “Customizing the appearance”The two elements output the WP-ImmoMakler templates and therefore follow the Customizer under Appearance → Customize → WP-ImmoMakler. To target one specific element, enter a CSS Class in its options and add your own CSS, for example via the WP-ImmoMakler Child-Skin plugin.
You might also be interested in
Section titled “You might also be interested in”- Template pages — Register pages as templates for the list and detail view
- Settings: Theme Builder
- Making update-safe customizations
- Customizing the list view